

Crochet Hook Tunisian Mini Shoulder Bag【Free Pattern】【Video】【Chart PDF】 Tunisian crochet tutorial
- May 15
- 8 min read


↓↓↓Here is the PDF file.↓↓↓(You can print it from here)
↑↑↑↑↑↑↑↑↑↑↑↑↑↑↑↑↑↑↑↑↑↑↑↑


In this tutorial,
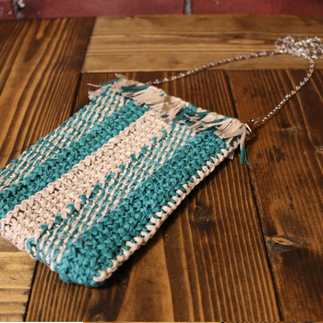
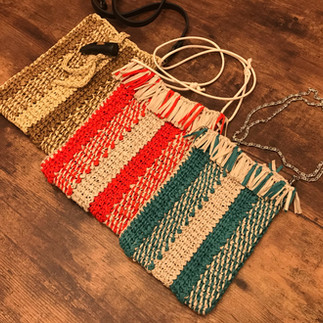
I’ll show you how to make this Tunisian crochet mini bag using a regular crochet hook.
Hi, I’m Kaitlin.
This time, I tried making a Tunisian crochet bag using a regular crochet hook.
Tunisian crochet can feel intimidating to start
because it often requires a special Tunisian hook and the patterns can seem complicated.
But for this project, we’ll use the same crochet hook you already use for regular crochet.
The fabric is worked mainly in basic Tunisian simple stitch,
but multiple pieces are joined together to create a fun textured look.
I hope you’ll give it a try as your very first Tunisian crochet project!
Materials:
・ Yarn: GIMA (46m/30g), Color No. 6 and No. 8 — 1 ball each or any other medium weight yarn
・ 4.0 mm crochet hook (3.0 mm crochet hook is also helpful for attaching the fringe.)
・ Tapestry needle
・ Stitch markers
・ Measuring tape
・ Scissors
・ Steam iron
・ 90 cm shoulder chain
・ 18 mm silver magnetic clasp
Gauge: (measured in a rectangular swatch)
Pattern stitch
20 sts × 16 rows = 10 cm square
Size:
Width: approx. 12.5 cm
Height: approx. 17.5 cm
This pattern is written in US terms
Use a 4.0 mm crochet hook throughout.
All pieces are worked in Tunisian simple stitch.
This project is worked in Tunisian crochet using a regular crochet hook.
In Tunisian crochet, one row consists of a forward pass and a return pass.
Piece ①
Using Color No. 6 Sand Beige, ch 6 to make the foundation chain.
Row 1
Forward Pass
Hold the hook like a knitting needle during the forward pass (knife grip).
Insert the hook into the back bump of the 5th foundation chain,
yarn over, and pull up a loop.
※The yarn is wrapped the same way as in regular crochet,
so the front strand of the yarn moves when yarning over.
Repeat this across to the end,
picking up the back bumps while keeping all loops on the hook.
Return Pass
Change to a regular crochet hold (pencil grip) for the return pass.
Change yarn colors.
Bring the working yarn from front to back over the hook,
then place Color No. 8 Peacock on the hook, leaving a 15 cm yarn tail.
Pull through the first two loops on the hook at the same time.
Yarn over again and pull through the next two loops on the hook.
Repeat this across to complete the return pass.
Row 2
Forward Pass
Change to the knife grip.
Insert the hook into the 2nd vertical bar of Row 1,
yarn over, and pull up a loop.Repeat this across to the end.
For the last stitch,
insert the hook under both the vertical bar and the final loop from Row 1.
Then bring the yarn tail of the newly attached peacock yarn from back to front over the hook.
With the yarn in place,
yarn over with the working yarn and pull through all 3 loops at once. (Video 04:36)
Return Pass
Change to the pencil grip.
Change yarn colors.
Bring the current working yarn from front to back over the hook,
then bring up the Color No. 6 Sand Beige yarn used for the forward pass of Row 1 and place it on the hook.
Pull through the first 2 loops on the hook at the same time.
Yarn over again and pull through the next 2 loops on the hook.
Repeat this across to complete the return pass.
Row 3
Forward Pass
Change to the knife grip.
Insert the hook into the 2nd vertical bar of the previous row,
yarn over, and pull up a loop.Repeat this across to the end.
For the last stitch,
insert the hook under both the vertical bar and the final loop from the previous row.
Then also insert the hook into the beige stitch underneath that is connected to the return pass,
yarn over, and pull up a loop. (Video 06:00)
Return Pass
Change to the pencil grip.
Change yarn colors.
Bring the current working yarn from front to back over the hook,
then bring up the Color No. 8 Peacock yarn used for the previous forward pass and place it on the hook.
Pull through the first 2 loops on the hook at the same time.
Yarn over again and pull through the next 2 loops on the hook.
Repeat this across to complete the return pass.
Rows 4–56
Repeat Row 3 while alternating yarn colors.
After completing Row 56, bind off with slip stitches.
Insert the hook into the 2nd vertical bar, yarn over and pull up a loop,
then pull it directly through the loop already on the hook.
Repeat this across to the end to complete the slip stitch bind-off.
※Be careful not to pull the yarn too tightly while binding off.
After working the slip stitch bind-off to the end,
ch 1.Cut the yarn, leaving a 10 cm tail, and pull it through the final chain stitch.
Steam Blocking
Hold the iron above the fabric without touching it,
and apply plenty of steam to the finished piece to shape and smooth the fabric.
Piece ②
Using Color No. 8 Peacock, work in a single color.
Ch 3 to make the foundation chain,
then work a slip stitch into the edge stitch of Row 1 of Piece ①. (Video 09:38)
Row 1
Forward Pass
Change to the knife grip.
Starting from the back bump of the 3rd foundation chain,
pick up loops across to the end.
Return Pass
Change to the pencil grip.
Yarn over and pull through the first loop on the hook.
※For single-color pieces, pull through only 1 loop at the edge stitch.
Yarn over again and pull through the next 2 loops on the hook at the same time.
Repeat this across.
After completing the return pass to the end,
work a slip stitch into the edge stitch of Row 2 of Piece ①. (Video 10:50)
Row 2
Forward Pass
Change to the knife grip.
Starting from the 2nd vertical bar, pick up loops across.
For the last stitch,
insert the hook under both the vertical bar and the edge stitch connected behind the vertical bar,
then pick up a loop. (Video 11:22)
Return Pass
Work in the same way as Row 1.
For the final slip stitch, work into the edge stitch of the next row of Piece ①.
Rows 3–56
Repeat Row 2, continuing to work slip stitches into Piece ① as you go.
After completing Row 56,
work a slip stitch bind-off in the same way as Piece ①.
Finish by working ch 1 and cutting the yarn.
Steam Blocking
Hold the iron above the fabric without touching it,
and apply plenty of steam to shape and smooth the finished fabric.
Steam each piece as it is completed.
Piece ③
Using Color No. 6 Sand Beige, work in a single color.
Ch 4 to make the foundation chain,
then work a slip stitch into the edge stitch of Row 1 of Piece ②.
Work in Tunisian simple stitch in the same way as Piece ②,
continuing to work slip stitches into Piece ② at the end of each return pass.
※The stitch count differs from Piece ②.
Piece ④
Work using Colors No. 6 and No. 8.
Work in Tunisian simple stitch in the same way as Piece ①,
changing colors during the return pass.
Continue working slip stitches into Piece ③ at the end of each return pass.
Piece ⑤
Using Color No. 8 Peacock, work in a single color.
Work in the same way as Piece ②.
Continue working slip stitches into Piece ④ at the end of each return pass.
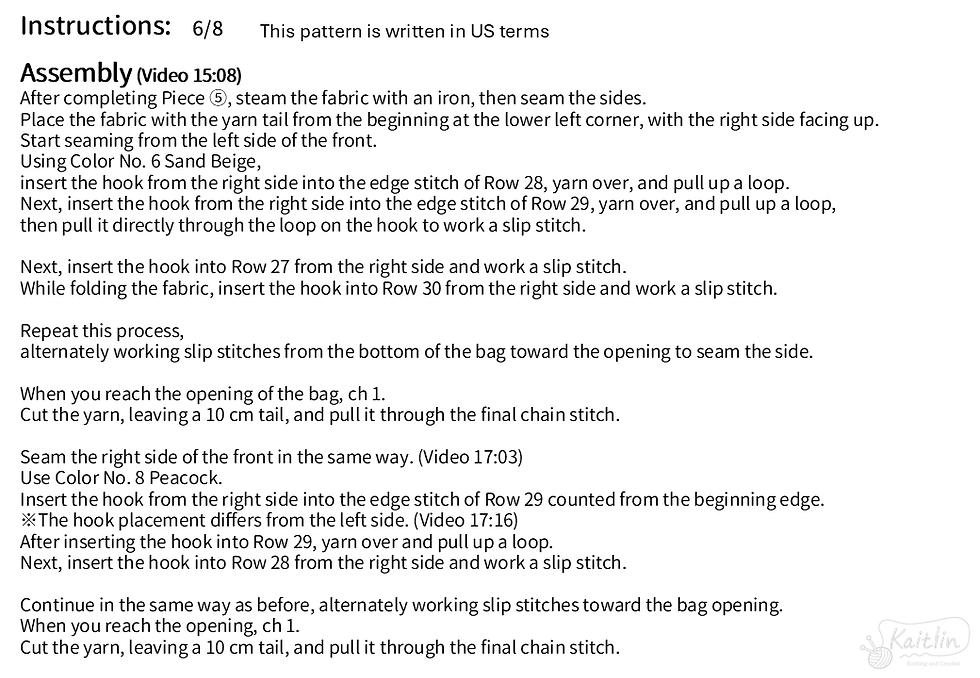
Assembly (Video 15:08)
After completing Piece ⑤,
steam the fabric with an iron, then seam the sides.
Place the fabric with the yarn tail from the beginning at the lower left corner,
with the right side facing up.
Start seaming from the left side of the front.
Using Color No. 6 Sand Beige,
insert the hook from the right side into the edge stitch of Row 28,
yarn over, and pull up a loop.
Next, insert the hook from the right side into the edge stitch of Row 29,
yarn over, and pull up a loop,
then pull it directly through the loop on the hook to work a slip stitch.
Next, insert the hook into Row 27 from the right side and work a slip stitch.
While folding the fabric,
insert the hook into Row 30 from the right side and work a slip stitch.
Repeat this process,
alternately working slip stitches from the bottom of the bag toward the opening to seam the side.
When you reach the opening of the bag,
ch 1.Cut the yarn, leaving a 10 cm tail, and pull it through the final chain stitch.
Seam the right side of the front in the same way. (Video 17:03)
Use Color No. 8 Peacock.
Insert the hook from the right side into the edge stitch of Row 29 counted from the beginning edge.
※The hook placement differs from the left side. (Video 17:16)
After inserting the hook into Row 29,
yarn over and pull up a loop.
Next, insert the hook into Row 28 from the right side and work a slip stitch.
Continue in the same way as before,
alternately working slip stitches toward the bag opening.
When you reach the opening,
ch 1.Cut the yarn, leaving a 10 cm tail,
and pull it through the final chain stitch.
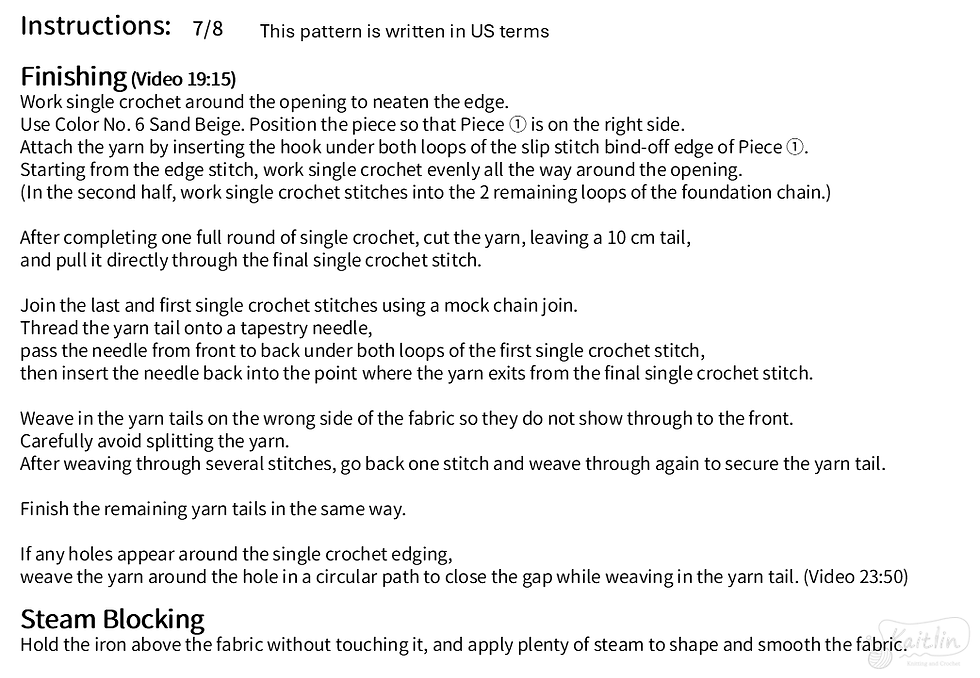
Finishing (Video 19:15)
Work single crochet around the opening to neaten the edge.
Use Color No. 6 Sand Beige.
Position the piece so that Piece ① is on the right side.
Attach the yarn by inserting the hook under both loops of the slip stitch bind-off edge of Piece ①.
Starting from the edge stitch,
work single crochet evenly all the way around the opening.
(In the second half, work single crochet stitches into the 2 remaining loops of the foundation chain.)
After completing one full round of single crochet,
cut the yarn, leaving a 10 cm tail,
and pull it directly through the final single crochet stitch.
Join the last and first single crochet stitches using a mock chain join.
Thread the yarn tail onto a tapestry needle,
pass the needle from front to back under both loops of the first single crochet stitch,
then insert the needle back into the point where the yarn exits from the final single crochet stitch.
Weave in the yarn tails on the wrong side of the fabric
so they do not show through to the front.
Carefully avoid splitting the yarn.
After weaving through several stitches,
go back one stitch and weave through again to secure the yarn tail.
Finish the remaining yarn tails in the same way.
If any holes appear around the single crochet edging,
weave the yarn around the hole in a circular path to close the gap while weaving in the yarn tail. (Video 23:50)
Steam Blocking
Hold the iron above the fabric without touching it,
and apply plenty of steam to shape and smooth the fabric.
Fringe (Video 19:15)
Attach fringe to the right side of the bag.
Prepare approximately 40 strands of yarn cut to 8–10 cm long.
Since only a small amount of Color No. 8 Peacock remains,
mix in a random amount as desired so that the total number of strands is 40.
Attach 2 strands of fringe to each single crochet stitch worked earlier.
Insert the hook from the wrong side into the top of the single crochet stitch.
Fold the yarn in half, place it on the hook,
and pull a loop through to the wrong side of the fabric.
Align the two yarn ends and pull them through the loop.
Insert the hook into the same stitch once more and attach another fringe strand.
Repeat this process to attach fringe along the single crochet edge.
After attaching all the fringe,
trim it to your preferred length and apply steam to shape and smooth the fringe.
Magnetic Clasp (Video 26:06)
Attach an insert-style magnetic clasp.
On the solid Sand Beige section,
about 2 rows below the bag opening,
insert the clasp prongs from the inside of the bag.
Avoiding the return-pass stitches,
bring the clasp prongs out beside the vertical bars,
then bend the prongs outward at the base to secure them.
Attach the other side of the magnetic clasp in the same way.
Attach the lobster clasps of the bag chain deeply onto the sides of the bag.
It’s finished! Great job.
This is an easy and approachable Tunisian crochet bag project,
so even if you’ve never tried Tunisian crochet before,
I hope you’ll give it a try!
I also share other knitting patterns and tutorials,
so be sure to check out my other posts, as well as my YouTube,
Instagram, and LINE stickers!
Thank you so much for reading until the end! ☻
st(s) = stitch(es)
ch = chain
sl st = slip stitch
sc = single crochet
Crochet Hook Tunisian Mini Shoulder Bag crochet tutorial